
Packet Broker Installation
Preparation before installation
Section titled “Preparation before installation”- Obtain the Packet Broker installation package with the appropriate person, the file name is:
AsterNOS-V5.xxx-NPB-Vx.x-xxxx_Gitxxxx-aarch64.binObtain the SonicNOS installation package (optional) with the appropriate person, the file name is:
AsterNOS-Vxxx.bin- Complete the initialization IP configuration in the initialization configuration of the device to ensure network connectivity. If there is no network condition, you need to prepare a USB flash disk
Uploading of installation files
Section titled “Uploading of installation files”The device supports TFTP, SCP or U disk to copy the version image to the device to be installed and upgraded, the initial user name of the device is admin, password asteros.
Device as TFTP Client Copy Image
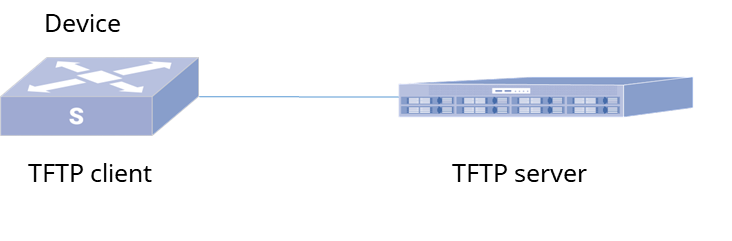
Section titled “Device as TFTP Client Copy Image”Device and file server interoperate, Device acts as a TFTP client and file server acts as a TFTP server, which needs to download the version image stored on the server to Device and complete the software version upgrade.
- Configure the IP address of the file server to guarantee that the file server and the Device can be reached by routes
- Start the Device’s TFTP server to complete the version image download
sonic# system bashUse 'exit' to return sonic-cliadmin@sonic:~$ tftptftp> helptftp> connect(to) 150.1.0.1tftp> get xxxx.binReceived 17437 bytes in 0.0 secondstftp> quitadmin@sonic:~$ lsxxxx.binCopying an image using SCP
Section titled “Copying an image using SCP”
- Configure the IP address of the file server to guarantee that the file server and the Device can be reached by routes.
- Use the SCP command on the device to complete the version image download.
sonic# system bashUse 'exit' to return sonic-cliadmin@sonic:~$ sudo scp server@192.168.0.100:/share/xxxx.bin .admin@sonic:~$ lsxxxx.binCopying an image using a USB flash drive
Section titled “Copying an image using a USB flash drive”This method is suitable when there is no network environment and you need to copy the version image to the device. Typically, the USB port is located on the front panel of the device.
- Insert the USB disk containing the system image into the USB port of the device
- Execute the command to view the disk name corresponding to the USB disk:
sonic# system bashUse 'exit' to return sonic-cliadmin@sonic:~$ sudo /sbin/fdisk -l- Create a directory for mounting the USB drive
admin@sonic:~$ sudo mkdir /mnt/usb/- Mount the USB drive. For example, the path of the USB drive is /dev/sdb4 . Please refer to the actual path.
admin@sonic:~$ sudo mount /dev/sdb4 /mnt/usb- Enter the disk directory and copy files from the disk to the device
admin@sonic:~$ cd /mnt/usbadmin@sonic:/mnt/usb$ sudo cp xxxx.bin /home/adminInstallation of the image
Section titled “Installation of the image”SonicNOS Installation
Section titled “SonicNOS Installation”When logging in using ssh you may enter the SONIC_CLI view, upload the SonicNOS image to the /home/admin directory and execute the command:
sonic# image update AsterNOS-V5.2xxxx.binPacket broker image Installation
Section titled “Packet broker image Installation”When using ssh login may enter the SONIC_CLI view, use the system bash command to enter the system, and then enter the directory where the image is located, direct execution of the installation package, such as permissions, please execute chmod +x to the installer can be executed permissions, the execution of the installation will be completed after the completion of the installation, the installation will be prompted after the completion of the Install success and reboot the entire device.
sonic# system bashUse 'exit' to return sonic-cliadmin@sonic:~$ sudo ./AsterNOS-V5.xxx-NPB-Vx.x-xxxx_Gitxxxx-aarch64.bin
[Parameters]-f Automatically removes historical backups or containers when they already exist.
Recommended to use the command line for the initial installation, subsequent upgrades are recommended to use the WEB system upgrade for version updates.